Common Spring Pool Opening Problems Homeowners Run Into (And What Usually Fixes Them)
A Diagnostic Walk-Through For The First Hour, The First Day, And The First Week
By
Published: April 24, 2026
Updated: April 30, 2026
Credit: Homeowner.ca
Key Takeaways
•Most spring opening problems trace back to a handful of simple states — water level, valve position, dried-out O-rings, a still-closed plug — not catastrophic equipment failure.
•Diagnose by symptom, not by panic. Air in the basket, a high pressure gauge, a quiet breaker, and cloudy water each point to different causes and demand different responses.
•There are clear DIY thresholds and clear stop-and-call thresholds. Confusing the two is how a $40 O-ring problem becomes a $4,000 motor and pad rebuild.
Opening a pool in the spring is a deceptively simple ritual. Pull the cover, top up the water, flip a few breakers, watch the pump catch — and then panic when something doesn't sound right. Most homeowners default to one of two mistakes: they assume the equipment is broken and call somebody, or they assume nothing is wrong and let the system damage itself for a week before noticing.
Both are expensive. The truth sits in a narrower band. The vast majority of spring opening problems are not equipment failures. They are simple states the pool was left in over the winter — a water level too low for the skimmer, a valve still closed from October, a dried-out O-ring, a basket nobody emptied, a plug nobody pulled. Diagnose them in order, and most resolve in the first hour without a service call. Diagnose them in the wrong order, and a few of them — particularly anything involving electrical loads, sealed pressure vessels, or hidden plumbing — quietly cause real damage.
This guide walks through the problems homeowners actually encounter at opening, grouped by category, with a clear handoff at the boundary between what you should fix yourself and what should never be a YouTube tutorial. Read the triage section first. Then jump to the symptom that matches what you're seeing. The order is intentional — earlier categories rule out simpler causes that later ones depend on.
First-Hour Triage: What To Check Before You Turn Anything On
The first hour of an opening is where most problems either resolve themselves quietly or get baked in for the week. The instinct is to flip the pump on and see what happens. Resist it. A pump that runs dry for thirty seconds because the skimmer was empty does more damage than a pump that sits unprimed for an extra ten minutes while you read a gauge. Walk through the system in order — pad, water, valves, plugs, lids — and confirm each state is one the pump can actually run against.
Print the table below, screenshot it, or pin it inside the equipment shed. Each row maps to a problem you can find before powering anything on, and each safe action costs you nothing if the finding turns out to be benign.
Step
What To Check
Common Finding
Safe Action
1
Equipment pad walk-around
Damp concrete, dripping fittings, cracked unions, bulged tank seam
Mark the leak point. Do not run the pump until visible cracks are evaluated.
2
Pool water level
Below the middle of the skimmer mouth
Top up to mid-skimmer before powering anything on.
3
Suction-side valves
Skimmer or main drain valve fully or partially closed
Open both fully. Confirm handle direction matches the line you can trace.
4
Return-side valves
Return valve closed; multiport handle on Closed or Winter
Open returns; set multiport firmly to Filter (pump must be off).
5
Skimmer and pump baskets
Leaves, mouse nests, last fall's tennis ball
Empty completely. Inspect basket for cracks.
6
Pump lid O-ring
Dry, cracked, or twisted
Wipe clean, lightly lubricate with silicone-based pool lube, reseat.
7
Return jets and drain plugs
Winterizing plugs still installed
Remove every plug. Count them against last fall's record.
8
Pressure gauge
Reads above zero with pump off
Replace the gauge before you trust any opening-week reading.
9
Breaker panel
Damp, corroded, or warm to touch
Stop. Call a licensed electrician before resetting.
10
Cover removal
Pooled water on top, fine debris
Pump or syphon cover water off the cover, never into the pool.
Walk The Equipment Pad Before Touching Switches
The first thing to do at any opening is the easiest thing to skip. Walk the equipment pad slowly. Look for damp patches on the concrete with no rain explanation, white mineral residue on fittings (the calling card of a slow drip that froze and thawed all winter), and hairline cracks running across the plastic of every threaded union. Pentair's homeowner guidance on opening a pool for the season recommends inspecting the equipment pad for plumbing leaks specifically because freeze-thaw cycles routinely crack unions, valves, and pipe couplings even when the system was correctly winterized.
A leak found before the pump is on saves the much larger problem of finding one after pressurizing the system. A union that weeps statically can spray under operating pressure. A hairline crack in a multiport body can split. The pad walk-through is the cheapest insurance the season offers.
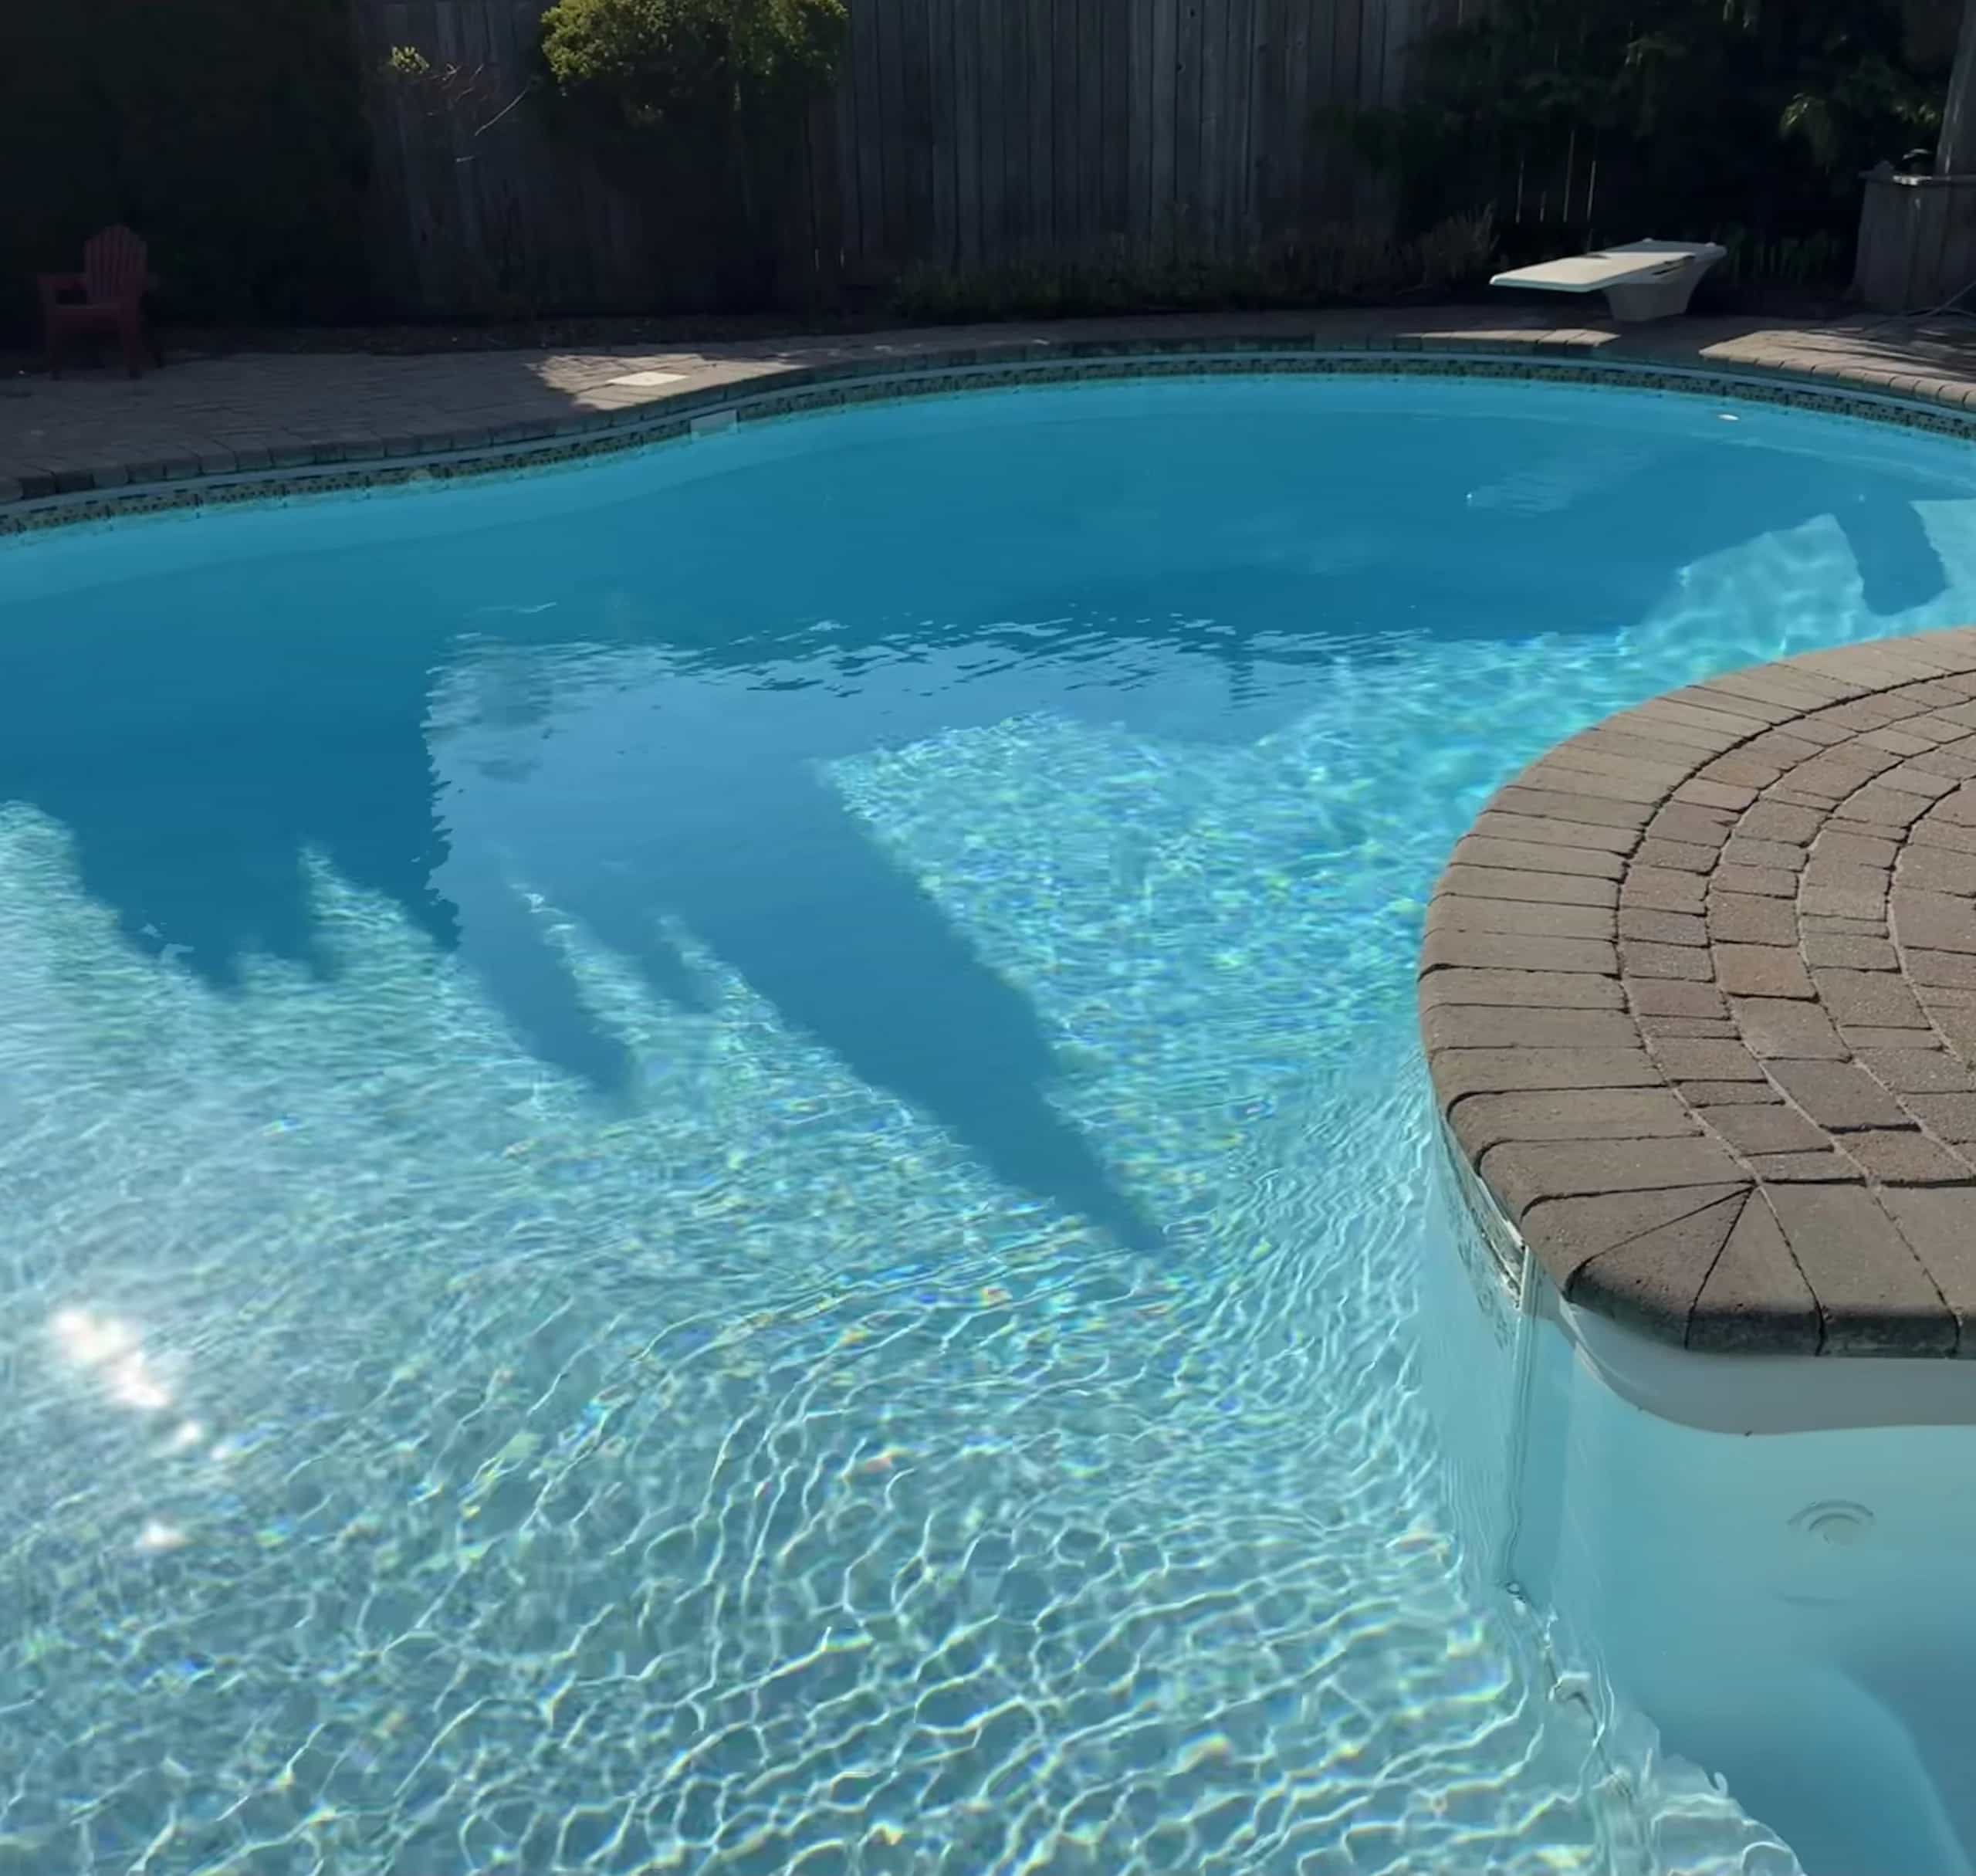
Top Up The Water Above The Skimmer Mouth
Water level is the single most under-credited cause of opening-day chaos. If the level sits below the skimmer, the pump can't draw water; it draws a slug of air. Pentair's pump manuals are explicit that water below the skimmer causes the pump to lose prime and run dry — damaging the mechanical seal and shaft components in minutes. Cover evaporation, winter leaks, or a sagging cover that pulled water out during removal can all leave the level lower than expected.
The standard is mid-skimmer or higher before any pump runs. Not "covering the bottom." Not "almost there." Mid-mouth. If you're filling for any length of time, set a timer; municipal water bills have a way of memorializing forgotten hoses.
Audit Every Valve Position (Suction, Return, Multiport)
Every valve on a closed pool is in some position the closer set it in — and some of those positions made sense for winter, not for operation. Trace each line from pool to equipment and confirm the handle is set for what you want now: skimmer open, main drain set for your system, returns open, heater bypass set, and multiport firmly on Filter.
The first hour of an opening is where most problems either resolve themselves quietly or get baked in for the week. The instinct is to flip the pump on and see what happens. Resist it. A pump that runs dry for thirty seconds because the skimmer was empty does more damage than a pump that sits unprimed for an extra ten minutes while you read a gauge. Walk through the system in order — pad, water, valves, plugs, lids — and confirm each state is one the pump can actually run against.
Print the table below, screenshot it, or pin it inside the equipment shed. Each row maps to a problem you can find before powering anything on, and each safe action costs you nothing if the finding turns out to be benign.
Step
What To Check
Common Finding
Safe Action
1
Equipment pad walk-around
Damp concrete, dripping fittings, cracked unions, bulged tank seam
Mark the leak point. Do not run the pump until visible cracks are evaluated.
2
Pool water level
Below the middle of the skimmer mouth
Top up to mid-skimmer before powering anything on.
3
Suction-side valves
Skimmer or main drain valve fully or partially closed
Open both fully. Confirm handle direction matches the line you can trace.
4
Return-side valves
Return valve closed; multiport handle on Closed or Winter
Open returns; set multiport firmly to Filter (pump must be off).
5
Skimmer and pump baskets
Leaves, mouse nests, last fall's tennis ball
Empty completely. Inspect basket for cracks.
6
Pump lid O-ring
Dry, cracked, or twisted
Wipe clean, lightly lubricate with silicone-based pool lube, reseat.
7
Return jets and drain plugs
Winterizing plugs still installed
Remove every plug. Count them against last fall's record.
8
Pressure gauge
Reads above zero with pump off
Replace the gauge before you trust any opening-week reading.
9
Breaker panel
Damp, corroded, or warm to touch
Stop. Call a licensed electrician before resetting.
10
Cover removal
Pooled water on top, fine debris
Pump or syphon cover water off the cover, never into the pool.
Walk The Equipment Pad Before Touching Switches
The first thing to do at any opening is the easiest thing to skip. Walk the equipment pad slowly. Look for damp patches on the concrete with no rain explanation, white mineral residue on fittings (the calling card of a slow drip that froze and thawed all winter), and hairline cracks running across the plastic of every threaded union. Pentair's homeowner guidance on opening a pool for the season recommends inspecting the equipment pad for plumbing leaks specifically because freeze-thaw cycles routinely crack unions, valves, and pipe couplings even when the system was correctly winterized.
A leak found before the pump is on saves the much larger problem of finding one after pressurizing the system. A union that weeps statically can spray under operating pressure. A hairline crack in a multiport body can split. The pad walk-through is the cheapest insurance the season offers.
Top Up The Water Above The Skimmer Mouth
Water level is the single most under-credited cause of opening-day chaos. If the level sits below the skimmer, the pump can't draw water; it draws a slug of air. Pentair's pump manuals are explicit that water below the skimmer causes the pump to lose prime and run dry — damaging the mechanical seal and shaft components in minutes. Cover evaporation, winter leaks, or a sagging cover that pulled water out during removal can all leave the level lower than expected.
The standard is mid-skimmer or higher before any pump runs. Not "covering the bottom." Not "almost there." Mid-mouth. If you're filling for any length of time, set a timer; municipal water bills have a way of memorializing forgotten hoses.
Audit Every Valve Position (Suction, Return, Multiport)
Every valve on a closed pool is in some position the closer set it in — and some of those positions made sense for winter, not for operation. Trace each line from pool to equipment and confirm the handle is set for what you want now: skimmer open, main drain set for your system, returns open, heater bypass set, and multiport firmly on Filter.
Important
Always change a multiport valve position with the pump off. Switching under pressure is the single most common way to wreck the internal gasket — a $30 part that turns into a $300 service call when it fails mid-season.
Pull And Inspect Every Plug, Eyeball, And Seal
Winterizing pulls water out of the system everywhere it could freeze, then caps the empty space with plugs. Opening reverses every one of those steps. The most-missed plugs are usually return jet eyeballs, the threaded plug on the pump drain, the plug at the bottom of the filter tank, and the plug in the heater. When one is missed, the pattern of damage is consistent: you pressurize the system, the trapped section can't equalize, and the weakest threaded connection cracks.
Keep a written list during winterization of every plug pulled and every Gizmo or freeze-protector installed — the same discipline applied to a household winterization checklist. Reference it line by line during opening. If you don't have the list, walk the system and confirm each return jet flows water before declaring the opening complete.
Open The Pump Lid And Check The O-Ring
The pump lid O-ring spends six months compressed under tension, then six months relaxed, dry, and sun-exposed on a winterized pad. It comes out of winter shrunken, cracked, or twisted out of its groove more often than not. Take the lid off, lift the O-ring out, wipe both ring and groove clean, apply a thin film of silicone-based pool lubricant — not petroleum jelly, which degrades rubber — and reseat carefully. A failing lid O-ring is the second-most-common cause of priming and air problems. Catching it during triage saves an hour of chasing phantom leaks later.
Priming And Air Intrusion Problems
Credit: Homeowner.ca
Once triage is clean, the pump goes on. This is where most "the pool isn't working" calls actually come from — the pump runs, but something is wrong. A pump that won't prime, bubbles in the basket, or weak return flow are the three primary symptoms, and they share a small set of root causes. Manufacturer troubleshooting tables for both above-ground and in-ground pumps converge on the same logic: water level, basket cleanliness, lid O-ring integrity, valve position, and suction-side air leaks. The diagnostic order is the same regardless of brand.
The Pump Won't Catch Prime
A pump that runs but never fills with water has lost prime. Pentair's residential pump troubleshooting tables list the recurring causes in a near-identical order: no water in the strainer pot, a damaged or unseated lid O-ring, water below the skimmer, clogged baskets, a closed valve on the suction side, low pump speed on a variable-speed model, and air leaks between the skimmer and the pump.
Work the list in that order. Open the pump lid, fill the strainer basket completely with a hose, reseat the lid with a clean and lubed O-ring, and try again. If it still won't catch, walk the suction line from skimmer to pump and confirm every valve is open. On a variable-speed pump, kick it to its highest priming RPM. Most prime failures resolve within the first three steps. The ones that don't are typically a deeper suction leak or a failed mechanical seal — at which point the symptom shifts from "won't prime" to "primes but makes a noise it shouldn't."
Warning
Do not run a pump that hasn't caught prime for more than thirty seconds at a time. Water cools and lubricates the seal. Without it, heat builds in the seal face fast enough to cause permanent damage in the time it takes you to wonder why the basket still isn't filling.
Persistent Bubbles In The Pump Basket Or At The Returns
Bubbles are air. Air in the basket means air is entering somewhere on the suction side — between the pool and the pump. Jandy's pump troubleshooting documentation names the usual suspects: water level too low (allowing air into the skimmer mouth as the pump pulls water), a loose or damaged pump lid, a worn or improperly seated lid O-ring, and air leaks at the union O-rings between the pump and the plumbing. Diagnose in that order — top up water first, check the lid and O-ring second, then loosen and reseat the union O-rings on the suction side.
A useful quick test: with the pump running, lightly mist the suspected joints with a spray bottle. A suction leak briefly stops bubbling when the mist is drawn into the leak point. The trick isn't perfect, but it narrows the search when the leak is hard to see.
Pump Runs But Returns Trickle (Or Don't Flow At All)
A pump that has caught prime but produces almost no flow at the returns is signalling either a restriction or a closed path. First, confirm the multiport is on Filter and not Recirculate, Backwash, Waste, or Closed. Next, confirm both baskets are empty — a small wad of leaves at the impeller inlet cuts flow dramatically. After that, the issue is almost always a partially closed valve, a return-side restriction (a stuck eyeball, a still-installed winterizing plug), or a pump speed set too low.
If everything is open, baskets are clean, and pump speed is normal, the next suspects are filter media (covered below) and the impeller itself. A pump that wintered with debris lodged in the impeller will sometimes start fine but never recover full flow. That's a "shut down and inspect" condition, not a "let it run and see" one.
The filter pressure gauge is the most informative instrument on the pad and the most often misread. Pentair's consumer education frames readings as a range rather than a number — most residential systems run between 8 and 25 psi, and what matters is deviation from each system's own clean-filter baseline, not an absolute target. A 15 psi reading is fine on one pool and a backwash signal on another. Note your clean baseline every spring after the first proper backwash and rinse, write it on the shed wall, and treat anything 8 to 10 psi above that as a cleaning cue. Anything below baseline is a different conversation.
High Filter Pressure With Weak Return Flow
Rising pressure paired with falling flow is the classic dirty-filter signal. At opening, "dirty" usually means a filter that wasn't fully cleaned at closing, an impacted sand bed, or a cartridge that picked up an enormous load on day one. The remedy is the standard one: backwash until the sight glass runs clear, rinse to settle the media, then return to filter mode. If pressure stays elevated after a clean cycle, the next suspects are a partially closed return valve, an undersized return eyeball, an oversized pump, and — for cartridge filters — media at end of life. The signs that media itself is failing rather than merely dirty are subtler, and the cues homeowners miss are worth knowing before you spend a season fighting symptoms.
Low Filter Pressure (Or No Pressure Reading At All)
Low pressure with weak flow is not the same problem as high pressure with weak flow, even though the visible result at the returns can look identical. The likely causes are upstream of the filter, not inside it. Jandy's Canadian filter overview lists the usual culprits as clogged pump baskets, suction-side air leaks, restrictions in the suction lines, low water level, a blocked impeller, or a pump running at too low a speed or too low a voltage. Work the suction side first. If the gauge reads zero with the pump running and water flowing, the gauge itself is suspect — pressure gauges are cheap, fail often, and tell you nothing if their sensing element is corroded shut.
Sand Or Filter Media Showing Up In The Pool
Fine sand or DE drifting from the returns onto the pool floor is not a cleanliness issue. It is a filter integrity issue. Pentair's filter documentation notes that sand appearing in the pool can signal a broken lateral or other internal damage — a structural failure inside a pressurized vessel. Freeze damage, rough handling, or age can all crack a lateral. The response is the same regardless of cause: shut the system down and have the filter opened by a pro. This is one of the clearer call-a-pro thresholds in the diagnostic tree, because disassembling a pressure vessel carries real risk if the procedure isn't familiar.
Filter Cycles Are Suddenly Short
A filter that needs backwashing every two days when it used to need it every two weeks is telling you something about the load on the water, not the filter. At opening, the load is usually a combination of cover-water spillover, organic debris from cover removal, and early-season chlorine demand that lets fine particulate stay suspended long enough to reach the filter. Resist the urge to backwash four times in a day — every backwash dumps thousands of litres and forces a fresh chemistry adjustment. One backwash, one rinse, then twenty-four hours before deciding what the filter actually needs.
Multiport Valves And Backwash Mishaps
Credit: Homeowner.ca
The multiport valve is a small, high-stakes part of the system. It moves water between filter, backwash, rinse, recirculate, waste, and closed positions, and it is the single most likely place on the pad to leak, leak silently, or fail mid-cycle. Pentair's backwash valve manuals open with the caution that filters and valves operate under high pressure and that pressure testing or repair work belongs to trained service personnel — which is the right framing for the homeowner relationship to this part. You operate the lever and inspect the body. You do not pressure-test or rebuild it.
Water Pouring Out Of The Waste Line While On Filter
Water visibly leaving the waste line while the multiport is set to Filter means either the lever isn't fully seated or the internal gasket has failed. Seat the handle firmly with the pump off, then run for thirty seconds and watch the waste line. If water still flows, the spider gasket inside the valve is the suspect. That repair involves disassembling the valve, replacing the gasket, and reassembling with the correct torque sequence. It's achievable for a homeowner who has done it before and risky for one who hasn't. If the manual diagrams don't immediately make sense, a service call is cheaper than a misassembled multiport on a freshly opened pool.
A Multiport That Leaks Around The Body Or Handle
A leak from the body of the multiport or around the handle stem is rarely a gasket issue. It's usually a cracked plastic body — most often a freeze-damage crack that looked harmless under the cover and opened under pressure. Multiport bodies cannot be reliably patched. Once the plastic has split, the part is replaced. There is no DIY shortcut that holds across a season.
Note
If you see a hairline crack on a multiport body during the pad walk-around, do not run the system to "see how bad it is." A pressurized crack propagates. Replace the valve before opening proceeds.
Confusion About The Multiport Position At Start-Up
For homeowners who don't operate the multiport often, the position labels are easy to misread. Filter is the routine running position — water flows from the pump, through the media, and out to the returns. Backwash reverses that flow inside the filter to clean the media and sends dirty water out the waste line. Rinse runs water through the filter the normal direction but out to waste, settling the media after a backwash. Recirculate bypasses the filter entirely. Waste sends pump output straight to waste, bypassing both filter and returns. Closed shuts everything. The lever must change with the pump off, every time. And every backwash must end with a brief rinse before returning to Filter — that single step prevents disturbed media from blowing into the pool on the next run.
Heaters And Heat Pumps Behaving Oddly In Cold Spring Weather
Credit: Homeowner.ca
Spring openings in Canada often happen when pool water is still in the low teens and air is still cool overnight. That climate context changes how heaters and heat pumps behave at start-up, generating a steady stream of "is something wrong with my heater?" calls that aren't really about something being wrong. Jandy's Canadian product information acknowledges that air temperature, wind, and environmental factors significantly affect heating performance — a heat pump that won't run efficiently below 10°C isn't malfunctioning, it's running into the physical limit that defines how heat pumps work.
A Heat Pump That Won't Kick On
Most residential pool heat pumps have a minimum ambient operating temperature below which they will not run, with a built-in lockout when air temperature drops too low. Cold-air starts also behave differently than mid-summer starts: the unit may run a long defrost cycle before producing useful heat, or cycle on briefly and stop while the controller assesses conditions. None of this indicates a fault. Confirm three things first — the breaker is on, the thermostat call is set above current water temperature, and air temperature is within the unit's stated operating range. If all three are true and the heat pump still won't engage, the diagnostic shifts to the unit itself, which is service-call territory.
A Gas Heater That Lights But Cycles Off Quickly
A gas heater that fires, runs briefly, and then shuts off is communicating that one of its safety circuits has interrupted operation. The most common opening-week trigger is inadequate water flow — the flow switch in the heater detects insufficient throughput and shuts the burner down to prevent overheating the heat exchanger. Insufficient flow at opening often traces back to one of the earlier categories: a partially closed valve, a clogged basket, a dirty filter, or a multiport not fully on Filter. Resolve the upstream flow problem and the heater usually returns to normal operation.
What never qualifies as DIY is anything inside the heater — gas trains, ignition modules, pressure switches, exhaust paths, or wiring. Those belong to a licensed gas technician. The split is clean: external flow problems are yours; internal heater problems are not.
Slow Temperature Climb You Shouldn't Panic About
A pool that goes from 8°C to 22°C is moving an enormous volume of heat. It will take days. A heat pump on a 50,000-litre pool can require multiple full days of run time to lift the water by ten degrees, and a gas heater isn't instantaneous either. The system isn't broken. It's working against the thermal mass of a cool spring environment. A solar cover that stays on overnight, a thermal blanket, and patience all help. A service call rarely does.
Water Clarity Problems In The First 48 Hours
Credit: Homeowner.ca
Once circulation, filtration, and heating are stabilized, the next problem most homeowners notice is the water itself. Cloudy, green, or off-coloured water at opening is normal, frustrating, and almost always resolvable through filtration, time, and a controlled chemistry response rather than a panic shock. The framing matters: most opening-week clarity issues are fine particulate or low free chlorine, not contamination crises.
Cloudy Water After The First Run-Through
Cloudy water after the first day of circulation usually means the filter is doing its job slowly. Particulate settles, gets disturbed, gets caught, and over the course of 24 to 72 hours the water clears. Test free chlorine, total alkalinity, and pH. Hold sanitizer at the recommended range for your system. Run the filter long, not aggressively. Backwashing every six hours when pressure has only risen a little does more harm than good — it dumps water you've just balanced and forces another adjustment. The right answer at opening is usually to leave the system alone for 24 hours and reassess.
Algae You Discover Under The Cover
Green water under a cover is the product of a winter sanitizer level that drifted to zero and a few days of ten-degree water producing the conditions algae loves. Brush walls and floor before sanitizing — detached algae filters and oxidizes far faster than algae stuck to a surface. Establish strong sanitizer levels. Run the filter continuously for 48 to 72 hours. Vacuum to waste rather than to the filter when bottom debris is heavy; the load coming off a green pool will overwhelm filter media and short-cycle the backwash process for days. Salt-cell systems often cannot generate chlorine fast enough to recover from a heavy bloom on their own, which is why understanding how the salt cell behaves at startup matters more in early spring than at any other point.
Cover Water That Slipped Into The Pool
Cover water — the rain, snowmelt, leaf tea, and organic debris that accumulated on top of the cover all winter — is almost always more contaminated than anything inside the pool. Health Canada's recreational water guidance notes that, at the start of a swimming season, contamination sources from surrounding land and structures should be identified before the water is used. The principle applies directly: assume the cover water is dirty and remove it accordingly. Pump or syphon cover water off the cover and away from the pool, then fold the cover inward to trap residual debris before lifting it clear. If a slug of cover water did make it into the pool — most homeowners experience this at least once — budget an extra day or two for clarity to return.
Tip
A wet/dry shop vac and a few feet of garden hose can turn cover-water removal from an hour-long swearing match into a fifteen-minute job. A cover pump runs cheap and pays for itself the first season.
Across every category above, there is a quiet boundary between problems a homeowner can resolve safely and ones that look similar but sit in hazardous territory. The deciding variable is almost always one of three: electricity at the pad, a sealed pressure vessel, or something hidden — underground plumbing, internal motor windings, a cracked structural element. None of those should be "let me see if I can figure it out from a video" projects. The cost of a service call is consistently lower than the cost of being wrong.
A Breaker That Trips More Than Once
A breaker that trips, gets reset, and trips again is signalling a fault drawing current the breaker is rated to interrupt. Pump troubleshooting tables list repeated tripping alongside incorrect motor terminal connections, low supply voltage, and overheated motors as conditions requiring an electrician — not a homeowner reset cycle. Reset once. If it trips again, stop. Pool equipment combines water and electricity in a way that makes electrical fault investigation a licensed-electrician job.
A Cracked Filter Tank, Multiport Body, Or Threaded Fitting
Anything cracked on the pressurized side of the system is a stop-and-replace condition. Filter tanks, multiport bodies, and the threaded fittings between pump, filter, and heater all hold operating pressure, and a hairline crack that looks harmless cold can split open hot. Pentair's safety documentation reinforces that these components should not be repaired or pressure-tested by untrained users because failure under pressure is genuinely dangerous, not merely inconvenient. Replacement is the answer. Patches and epoxies are not.
A Suspected Underground Or Hidden Leak
A pool that loses noticeable water with the equipment off is leaking somewhere in the structure or underground plumbing. A pool that loses water only with the equipment on is leaking on the pressure side — usually a return line. Both diagnoses begin with a bucket test (a bucket on a step filled to the waterline, compared after 24 hours) to confirm the loss isn't normal evaporation. Once a leak is confirmed, locating it requires electronic listening equipment and dye-test experience. Excavating a return line based on a guess is the most expensive way to misdiagnose a pool plumbing problem.
A Pump That Hums But Won't Spin Or Runs Hot
A pump motor that hums without turning has either a seized rotor, a failed start capacitor, or both. A pump that runs but smells hot or trips its thermal overload is signalling internal damage. Either situation belongs to a service technician — partly because the diagnosis requires bench testing that doesn't happen poolside, and partly because the failure modes are exactly the ones that produce shock and fire risk at a wet equipment pad. The temptation to "open it and see" is precisely the wrong instinct here.
Anything Involving Gas Heater Wiring, Gas Lines, Or Pilot Issues
Gas heaters introduce a category of risk fundamentally different from anything else on the pad. Gas leak detection, ignition module replacement, pressure switch testing, exhaust inspection, and wiring repair all belong to licensed gas and HVAC technicians. The Government of Ontario's safety guidance for working around energized equipment establishes the principle plainly: equipment should be de-energized and tested for zero energy before being opened. That applies to pool heaters as much as to any other equipment carrying both gas and electrical loads. If the cause isn't an upstream flow problem, the next call is a technician, not a tool kit.
Important
Spring opening pairs naturally with the broader rhythm of seasonal home maintenance — air-conditioning startup, exterior plumbing checks, and the reverse of every winterization step taken in October. Treat the pool as one node in that calendar, not as an isolated project. The habits that catch a frozen pad union also catch a sticking AC contactor, a cracked hose bib, and a sump pit nobody checked since November.
Ryan is the founder of Homeowner.ca and a proud Canadian homeowner based in Guelph, Ontario. Over his 25-year career in digital publishing, he has focused on transforming complex information into clear, practical guidance that helps people make confident, well-informed decisions.
Plan for a week. The mechanical work — cover off, plugs out, equipment running, filter cycling — usually takes a half-day. The chemistry, clarity, and temperature recovery typically take five to seven additional days, longer if the pool went under the cover with weak sanitizer.
No. Almost no residential pool needs full drainage at opening. The volume that came off the cover and the volume needed to top up to mid-skimmer is the only water replacement most pools require. Full drainage is a reaction to specific water-quality problems (extremely high TDS, calcium hardness out of range), not a routine opening step.
Almost always one of three things — a multiport not fully seated on Filter, a closed or partially closed valve on the return side, or a winterizing plug still installed in a return jet. Walk the system and confirm each path is open before suspecting equipment failure.
No. A reading of zero with a pump running and water visibly flowing means the gauge has failed — they're inexpensive parts that fail routinely after a winter on a wet pad. Replace it. You cannot diagnose anything else about the filter without a working gauge.
No. Sand in the pool from a sand filter usually indicates an internal failure — most often a cracked lateral. Continuing to run the system blows more sand into the pool and can damage other components. Shut it down and have the filter opened by a pool service technician.
Top up to the middle of the skimmer mouth before the pump runs. If the level is below the skimmer, the pump will draw air, lose prime, and risk damaging the mechanical seal in the time it takes to notice the problem.
Probably not, if the air is cold. Most residential pool heat pumps have a minimum ambient operating temperature below which they will not engage at all. Confirm the air is within the unit's operating range before assuming a fault. If it is, and the unit still won't engage, that's a service call.
Shock if the water is visibly green or if the chlorine demand is clearly high. Don't shock reflexively just because it's opening day. Adding a heavy oxidizer dose to balanced water with low chlorine demand wastes product and disrupts the chemistry you're trying to stabilize.
Run a bucket test. Fill a bucket on the top step to match the pool waterline, mark both, leave the system on for 24 hours, and compare drops. Equal drops point to evaporation. Pool dropping faster than the bucket points to a leak — and pool dropping faster only with the pump on points to a leak on the pressure side.
Running the pump before confirming water level and basket condition. Pumps that run dry, even briefly, can damage their mechanical seals in the time it takes to walk back from the equipment pad to the pool. The fix is always to triage first and switch second.
Only if you've done it before and the manual diagrams immediately make sense. Pressurized valves carry real risk if reassembled incorrectly. The cost of a pool tech doing it right is typically one-quarter the cost of a misassembled valve damaging downstream equipment.
Once after the first 24 hours, then only when filter pressure climbs 8 to 10 psi above the clean-baseline reading you noted that day. Aggressive backwashing dumps water and chemistry repeatedly and slows clarity recovery rather than helping it.
Health Canada. Guidelines for Canadian Recreational Water Quality – Microbiological Pathogens and Biological Hazards. Retrieved from https://www.canada.ca/
Health Canada. Consultation: Guidelines for Recreational Water Quality – Understanding and Managing Risks. Retrieved from https://www.canada.ca/
Health Canada. Well Water Safety During and After Emergencies. Retrieved from https://www.canada.ca/
Government of Canada. Hazard Alert: Electric Shock. Retrieved from https://www.canada.ca/
Government of Ontario. Safety Guidelines for the Live Performance Industry – Electrical. Retrieved from https://www.ontario.ca/
Government of Ontario. Safety Guidelines for the Film and Television Industry – Appendix B Electrical Safety. Retrieved from https://www.ontario.ca/