What a Home Mould Inspection Includes: Methods, Credentials, and Red Flags
A Canadian Homeowner’s Guide to What “Good” Looks Like Before You Pay for Testing
By
Published: March 18, 2026
Updated: March 21, 2026
Close-up mould on drywall meets a moisture meter’s probe, where credentials separate testing from guesswork. (Credit: Shutterstock.com)
Key Takeaways
•A credible mould inspection starts with a detailed visual walk-through and moisture investigation, not a stack of lab samples.
•Credentials matter, but process matters more: look for clear scope, documentation, and a report that links findings to moisture causes and next steps.
•Treat “pass/fail” spore counts and fear-based sales tactics as red flags; the goal is to locate moisture, map affected materials, and plan remediation.
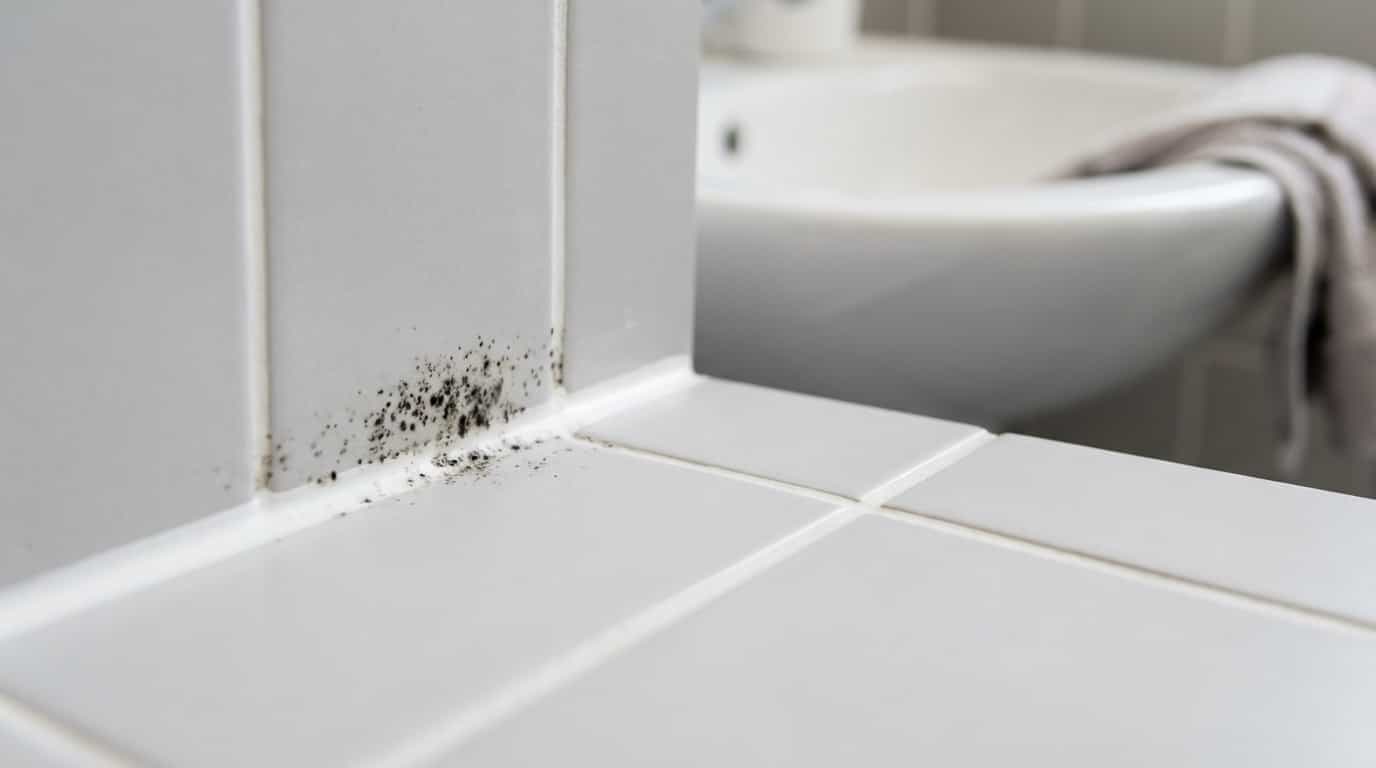
A home mould inspection is best understood as a building investigation, not a medical test and not a “lab results” product. The inspector’s job is to figure out where moisture is getting in (or failing to get out), what materials have been affected, and what should happen next to stop mould from returning.
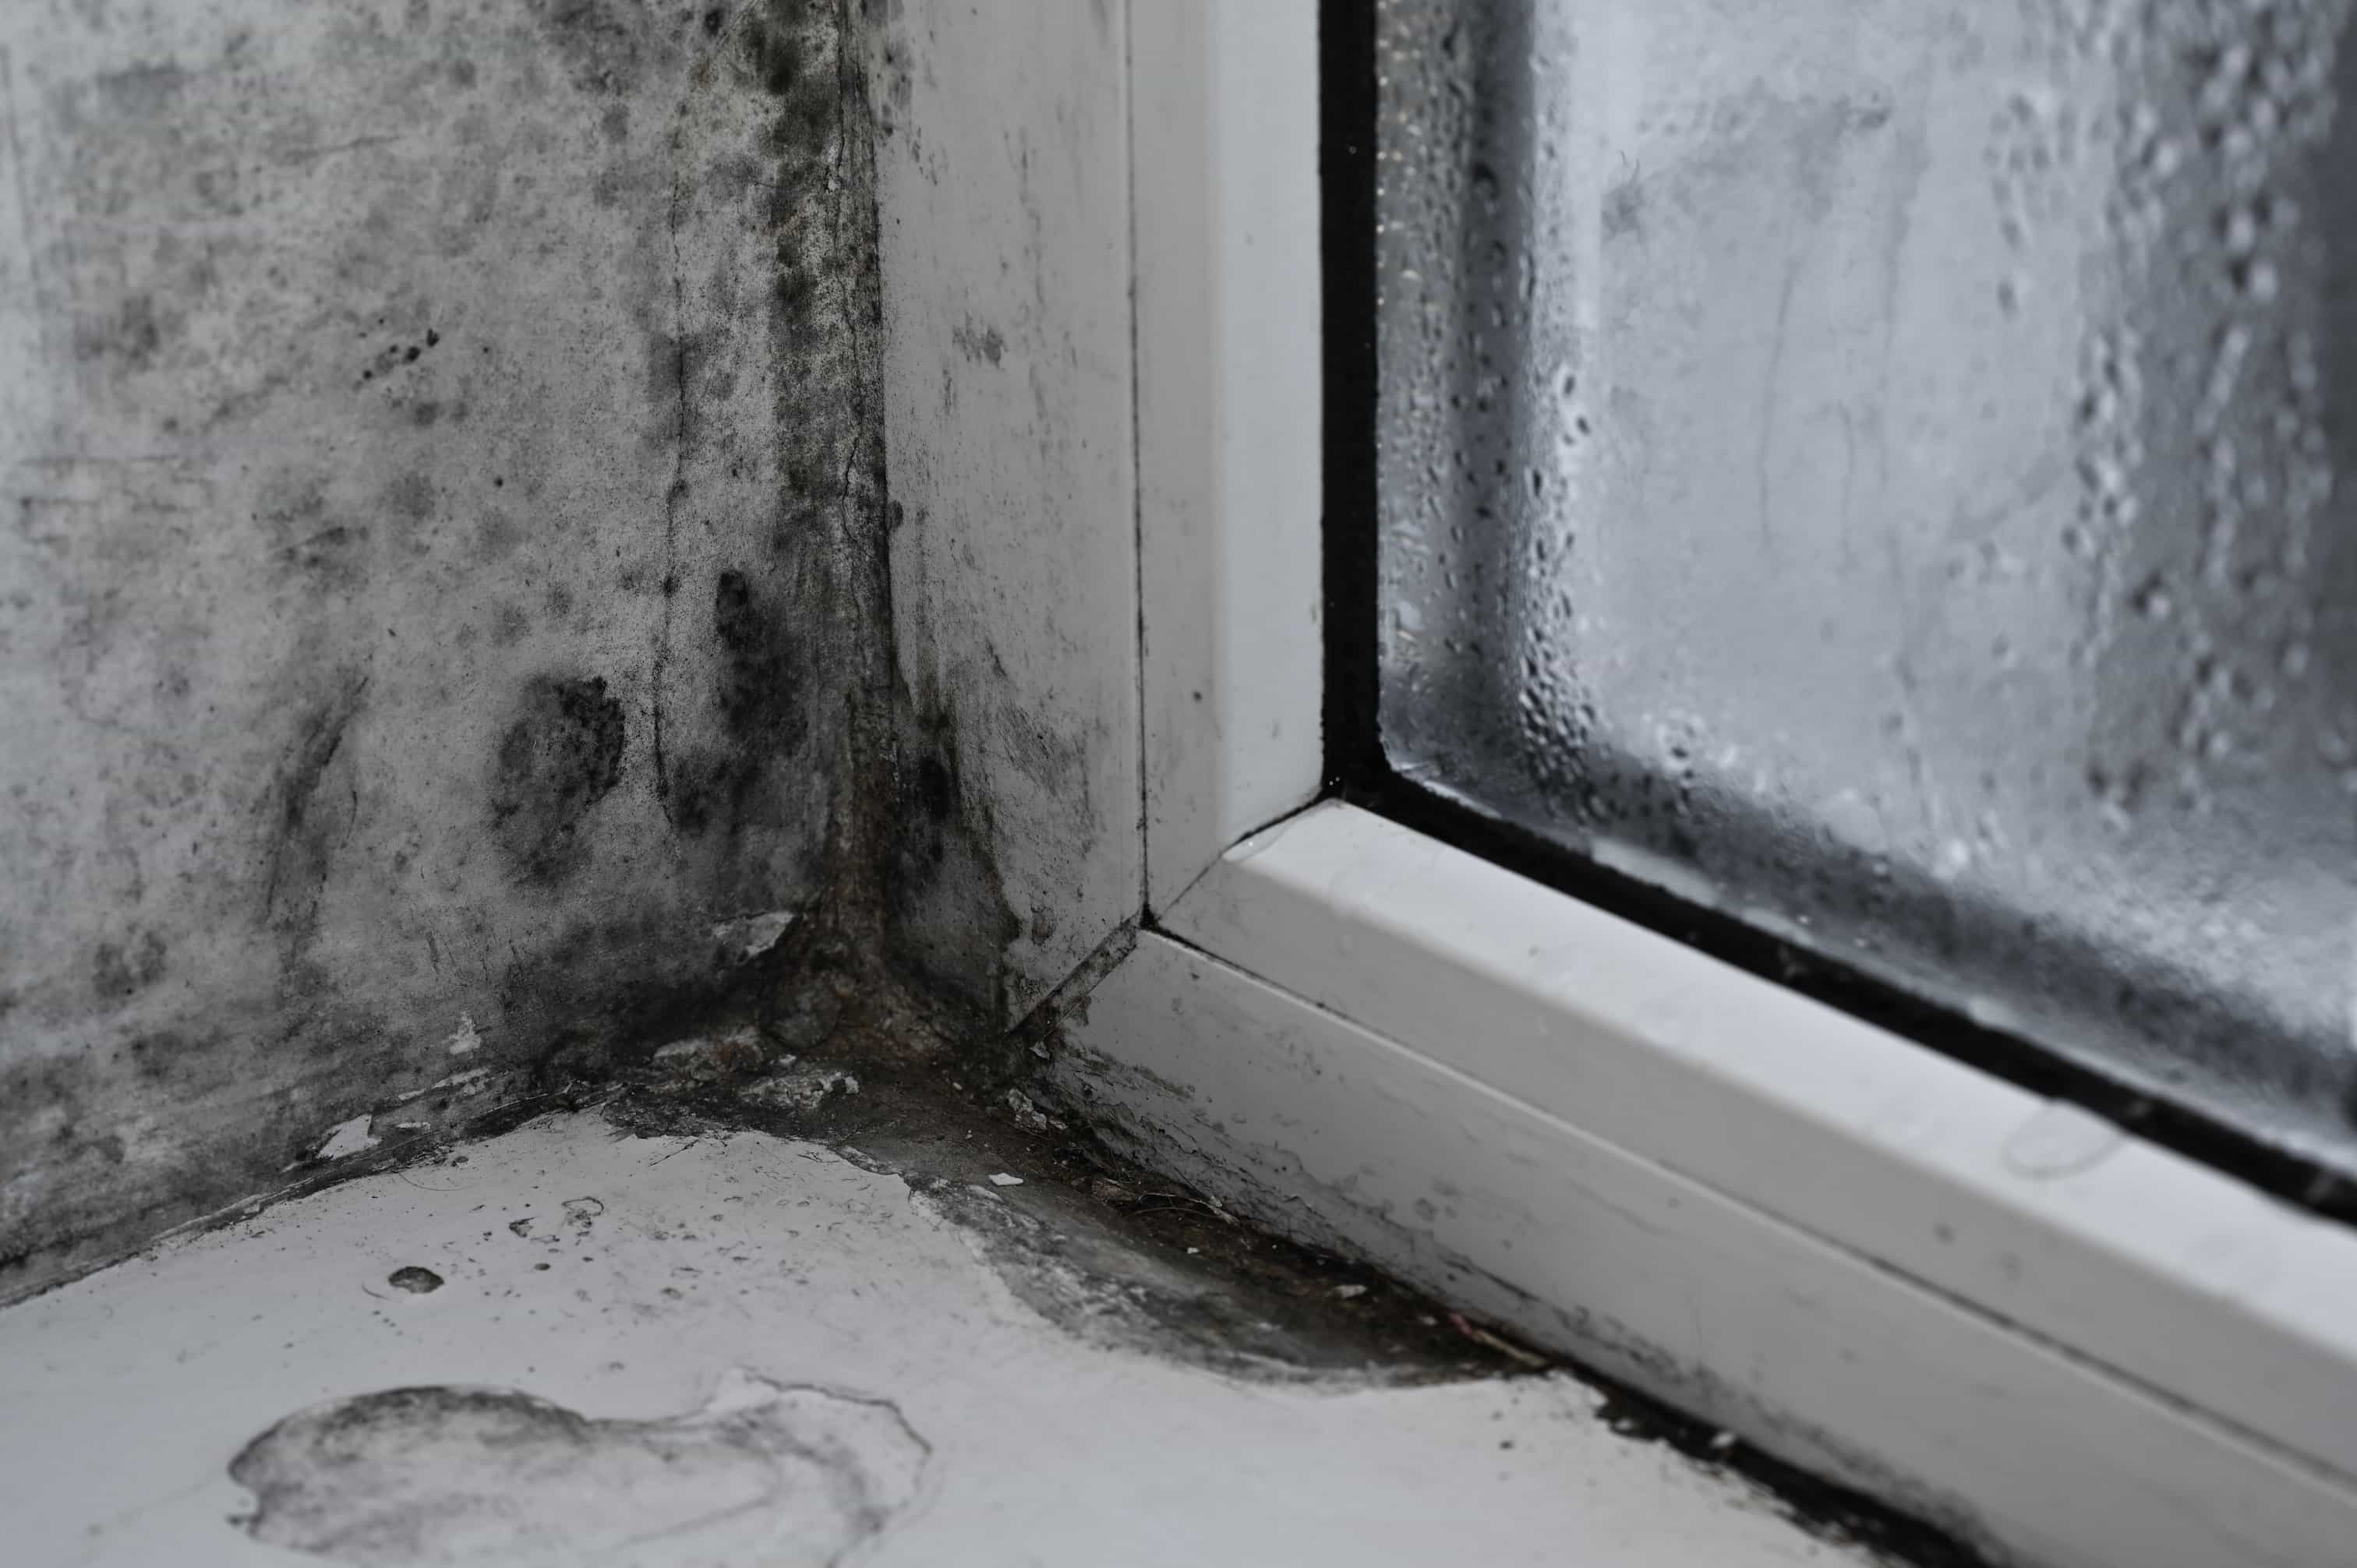
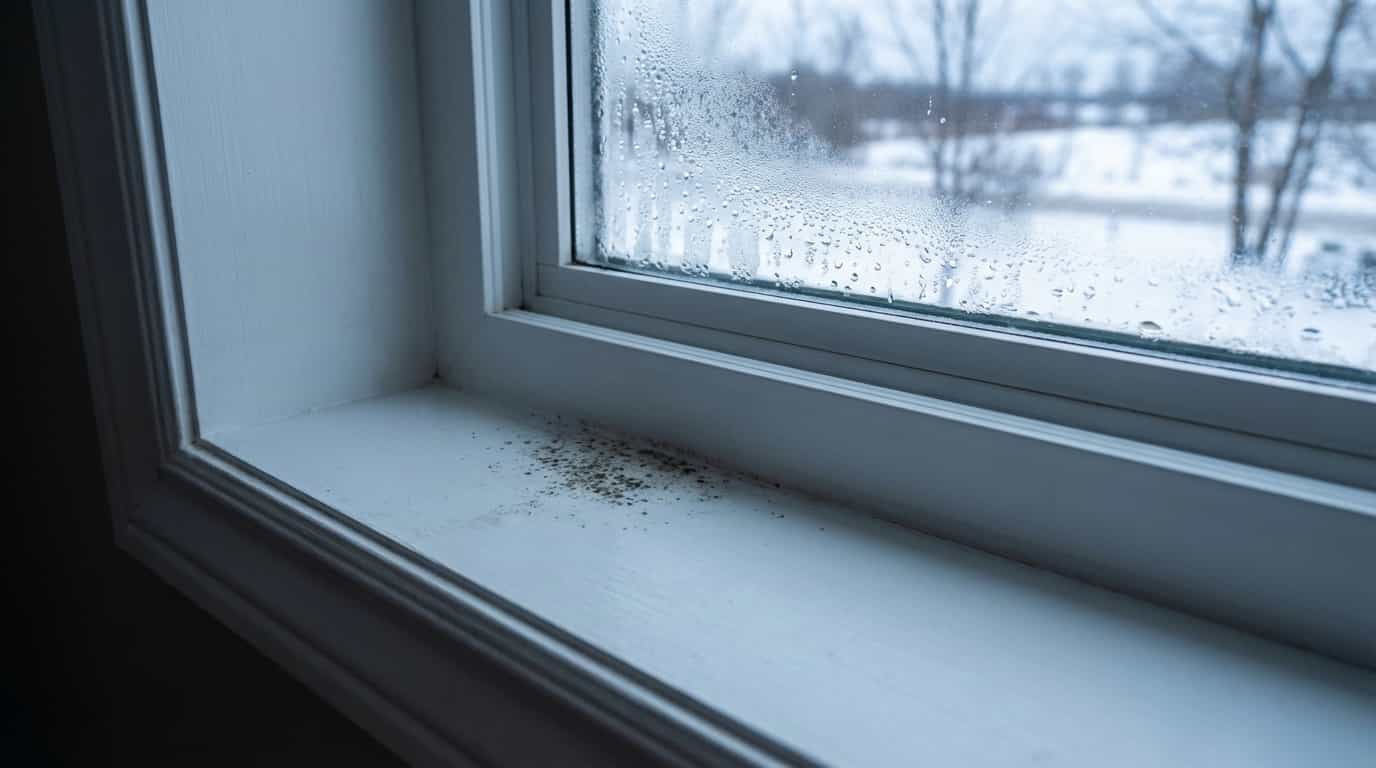
That distinction matters because mould is rarely a standalone problem. It is usually a symptom of something else: a roof leak that only shows up during wind-driven rain, a slow plumbing drip that never quite makes the floor wet, a cold corner that condenses every winter, or a basement that stays damp through a humid Canadian summer. If the inspection doesn’t hunt for the moisture story, it can miss the real cause—even if it takes samples.
Homeowners also deserve a realistic expectation of what “testing” can and cannot do. Lab reports can help confirm that a suspicious patch is fungal growth, or help point to hidden growth in limited scenarios. But the best inspections use sampling as a tool, not as the whole service.
This guide breaks down what a proper mould inspection typically includes, what credentials are meaningful in Canada, and what red flags signal you’re paying for theatre instead of investigation. Use it as a checklist before you sign anything—and as a way to sanity-check the report you get back.
Visual Walk-Through: The Foundation Of Every Mould Inspection
What A Thorough Walk-Through Looks Like In Real Homes
A credible inspection starts with time on-site and an intentional visual walk-through because Health Canada’s guidance on addressing moisture and mould in your home frames visual evidence and dampness clues as the practical starting point before you jump to lab work. In plain terms: a serious inspector is looking for what the house is telling you—visible growth, water staining or discolouration, peeling paint, warped wood, efflorescence on masonry, and persistent musty odours—across living spaces and the “forgotten zones” like basements, crawl spaces, storage areas, and attics.
A good walk-through is not a quick lap around the main floor. Expect the inspector to slow down around:
Exterior walls and corners (common condensation spots in winter)
Window frames and sills (leaks and cold-surface condensation)
Under sinks, behind toilets, and around tubs/showers (slow plumbing leaks)
Basement rim joists and foundation walls (seasonal seepage and humidity)
A practical checklist like the one in the Public Service Alliance of Canada mould fact sheet captures a detail many homeowners don’t realize is part of “visual inspection”: looking under and behind things, not just at what’s in plain sight. That means checking carpeting and floor coverings, fabric on and under furniture, ceiling tiles, drywall, and areas that collect standing water (including around air conditioners or drip pans).
The real signal of quality is documentation. A strong inspector is building a record: photos, notes about locations and conditions, and a working theory about moisture pathways. If you finish the walk-through and the only “deliverable” is a promise of lab results, the inspection has likely skipped the hardest part.
Tip
Before the appointment, write down a “moisture timeline” (leaks, floods, roof work, plumbing repairs, humidifier use, seasonal condensation) and leave access to attic hatches, crawl spaces, and storage rooms—reducing friction helps the inspector spend time investigating instead of negotiating access.
Advertisement — Article Continues Below
Moisture Clues And Building History: Finding Hidden Mould
Why The Best Inspectors Start With Water, Not Spores
The most useful mould inspections treat moisture like the primary evidence and mould like the secondary consequence. That’s why tools and techniques that reveal dampness matter. A moisture meter is a common, practical instrument because University of Waterloo safety guidance on mould in buildings explains that visual inspection is the most reliable method overall while also noting that moisture measurements in materials like drywall or wood can help identify conditions that promote growth even when surfaces look “fine.”
In a Canadian home, moisture investigation should also include questions—because buildings have memory. Expect a competent inspector to ask about:
Past flooding or sewer backups (even if “it dried out”)
Ice damming or roof leaks during freeze–thaw cycles
Window condensation patterns in winter
Basement dehumidifier use in summer and whether it keeps up
Bathroom fan performance and whether it vents outdoors
Any recent renovations that may have sealed assemblies tighter
This matters because hidden growth is a known reality and Health Canada’s homeowner guidance describes that mould can exist behind walls, above ceiling tiles, and in other concealed damp areas, which is why inspection should target locations tied to known or suspected water damage, leaks, condensation, or flooding. In practice, that often means the inspector spends disproportionate time in the “risk corridors” of the home—around plumbing chases, exterior corners, attic penetrations, and below-grade walls—rather than spreading attention evenly across every room.
You can use a simple quality check here: does the inspector attempt to connect symptoms to a plausible moisture source? A stain on drywall is not just “a stain.” It’s a clue that prompts follow-up: Where did the water come from, how long has it been happening, and is the material still damp?
Important
If an inspector does not ask about leak history, seasonal condensation, or humidity control—and does not discuss likely moisture sources—assume you’re paying for surface-level observation, not a building investigation.
Sampling Toolbox: Air, Surface, And Bulk Tests And What They Actually Do
When Lab Work Helps And When It Mostly Adds Noise
Sampling can be useful, but only when it answers a specific question that the visual and moisture investigation couldn’t resolve. In Canadian technical guidance, the Canadian Conservation Institute mould bulletin describes the common sampling families you’ll see in proposals and reports: air samples, surface samples (often tape lifts or swabs), and bulk samples (pieces of contaminated material like drywall or carpet) that are typically analyzed in a lab.
Here’s what each type is for, in homeowner terms:
Air sampling (spores in air):
Useful when the concern is hidden mould and there’s a reason to suspect air movement from a concealed area into living space. Less useful when visible growth is already present—because the building already told you there’s a problem.
Surface sampling (tape lift or swab):
Useful to confirm that a suspicious discolouration is fungal growth (versus soot, dust, or staining) or to identify general fungal types on a surface. It does not measure how “dangerous” something is.
Bulk sampling (piece of material):
Useful when the question is whether the material itself is contaminated (and potentially should be removed) or when a lab needs a more definitive sample than a swab can provide.
When indoor air sampling is done, comparisons matter. Many practitioners collect an outdoor sample at the same time for context and one Canadian inspection example from Clarke Engineering describes the common logic: indoor levels that are higher than outdoors or show different species may suggest indoor amplification that warrants more investigation. The key word is suggest—air sampling can guide attention, but it does not replace finding the moisture source.
Warning
A sampling plan that can’t explain why each sample is being taken (location logic, what decision it will change, and what “next step” follows each possible outcome) is often a sign the samples are being sold because they are easy to sell, not because they are necessary.
Advertisement — Article Continues Below
Air Testing Reality Check: What Federal Guidance Says In Canada
Why “Pass/Fail” Spore Counts Don’t Exist
If a company promises to “prove the home is safe” with air tests, you should slow down. Canada does not treat residential mould testing as a pass/fail clearance system because Health Canada’s Residential Indoor Air Quality Guideline on moulds explains that there are no numerical exposure limits for indoor mould and that results from tests for fungi in air cannot be used to assess health risks to occupants. That changes how you should interpret a report: spore counts and species lists are clues about building conditions, not a health “score.”
Federal guidance also de-emphasizes routine sampling as a default approach. Many assessments can be completed without air sampling and sampling is not recommended as the first step when Health Canada’s guidance for indoor air quality professionals is followed, which is why a strong inspection proposal leads with inspection scope, moisture investigation, and documentation rather than leading with lab packages.
That doesn’t mean air testing is never appropriate. In limited cases, sampling can be a targeted tool when questions remain after inspection—particularly with a history of flooding, roof leaks, or plumbing leaks that may have affected wall cavities—because Health Canada’s homeowner guidance describes how a qualified professional might recommend non-viable air testing to detect “indicator moulds” that point toward hidden problems. That’s a very different use case from “we always do air tests.”
A helpful homeowner filter is to ask: What decision will this test change? If the answer is vague (“we’ll see what’s in the air”), you’re likely buying uncertainty.
Note
Even guidance aimed at larger buildings stresses inspection and evidence of dampness as the basis for action, and Health Canada’s office-building guidance for professionals reinforces the broader principle that remediation decisions should be rooted in inspection findings rather than routine testing alone.
Credentials That Matter: Inspector Qualifications And How To Verify Them
Home Inspection Competency Plus Mould Investigation Skills
A mould inspection sits at the intersection of building science, moisture dynamics, and practical field investigation. In Canada, a strong baseline credential is involvement in the professional home inspection ecosystem. The Canadian Association of Home & Property Inspectors is positioned as a national voice for the industry and its overview of members and the association explains the role it plays as a national non-profit organization in the home inspection space.
More importantly, you want evidence of competence and ethics. CAHPI membership is structured and CAHPI’s home inspector requirements describe expectations like passing a national exam, completing mentoring with peer evaluation, maintaining continuing education, and inspecting to recognized standards while following a code of ethics. For homeowners, that’s meaningful because it signals the inspector is accountable to a framework beyond their own marketing.
Training pathways also matter. If an inspector can only point to informal “certificates” with unclear rigour, be cautious. CAHPI lists recognized education providers across regions and its training program directory illustrates that structured training exists in Canada through institutions and established programs, which makes “I learned on YouTube” a weak substitute.
Because mould work is specialized, it’s reasonable to ask what mould-specific training they have in addition to general inspection competency. A credible example of a structured investigative approach is the National Collaborating Centre for Environmental Health course and the NCCEH mould investigation online course shows that there are systematic walkthrough-based methods taught to environmental health professionals—methods that translate well to residential assessments even if the course is not homeowner-focused.
A practical way to evaluate credentials without getting lost in acronyms is to ask for:
Proof of insurance (professional liability / errors and omissions where applicable)
A sample report (redacted) showing how they document findings and reasoning
A clear explanation of how they decide whether sampling is necessary
Their policy on conflicts of interest (especially if remediation is also offered)
Tip
Ask “What would you do differently in a 1970s bungalow with a finished basement versus a new, airtight townhouse?” The quality of the answer tells you whether the inspector understands Canadian building assemblies and moisture behaviour, not just mould buzzwords.
Advertisement — Article Continues Below
What A Good Report Includes: Photos, Rationale, And Clear Next Steps
A Report Should Explain The Building Problem, Not Just List Lab Results
A homeowner-friendly mould report should help you make decisions: what is happening, how confident the inspector is, what needs to change, and what order to tackle things in. Many Canadian firms describe delivering written or electronic reports that summarize findings and sampling (when used), and one example service description from AUSCAN reflects the common expectation that results are documented and communicated rather than left as raw lab data with no context.
A strong report typically includes:
Scope and limitations: what was inspected, what could not be accessed, and why
Condition evidence: photos and plain-language descriptions of staining, visible growth, odours, and moisture indicators
Sampling rationale and locations (if any): why samples were taken and what question each was meant to answer
Severity framing: an estimate of affected area (even if approximate) and why that matters for next steps
Actionable recommendations: immediate moisture control steps, remediation options, and when to bring in specialists
A useful way to read a report is to look for “cause–effect–next step” chains. If the report says “mould present” but never says “moisture source likely X” and “corrective action Y,” it’s incomplete.
One reason scope matters is that deliverables should be agreed in advance. Service agreements that define reporting expectations and clarify roles around remediation reduce misunderstandings, and Health Canada’s guidance for indoor air quality professionals stresses the value of clearly outlining scope, report requirements, and who will identify, hire, and oversee remediation work to manage potential conflicts.
Here’s a quick rubric you can use as you skim:
Report Element
What “Good” Looks Like
Photos and locations
Images tied to specific rooms/areas so you can verify and re-check later
Moisture hypothesis
A plausible explanation of where water is coming from and why it persists
Sampling interpretation
Clear limits stated, not “this proves you’re safe/unsafe”
Recommendations
Prioritized steps, with “stop the water” before “clean the mould”
Uncertainties
Honest gaps (blocked access, concealed cavities) and what would reduce uncertainty
Important
If the report reads like a lab printout stapled to a receipt, ask for the missing layer: what the findings mean for the building and what should happen next.
Red Flags: Patterns That Signal A Weak Or Biased Inspection
How Homeowners Get Burned And How To Spot It Early
Some mould inspections fail because they’re sloppy. Others fail because the business model rewards volume and upsells. Either way, the patterns are recognizable.
The biggest service-pattern red flag is an “air test package” sold as the entire inspection. That approach conflicts with the premise that inspection and evidence of dampness should drive decisions, and Health Canada’s guidance for indoor air quality professionals supports the idea that many assessments can be completed without sampling and that sampling is not recommended as the first step. If you’re being rushed toward lab work before the inspector has even investigated moisture, you’re likely paying for the easiest deliverable rather than the most useful one.
Another common red flag is muddled roles. If the same company inspects, declares an urgent hazard, and immediately offers a high-priced remediation contract with no independent oversight, you should pause. This doesn’t automatically mean wrongdoing, but it does increase the risk of conflicted recommendations—especially if the scope of remediation is vague or fear-based.
On-site behaviour can also signal professionalism. In situations where mould or dust exposure is plausible, personal protective equipment is not a “nice-to-have.” During evaluation and clean-up planning Health Canada’s homeowner guidance recommends at minimum eye protection, a well-fitting disposable N95 respirator, and disposable gloves, which makes an inspector who crawls through a suspect attic or opens a mouldy wall cavity bare-faced look less like a professional and more like someone cutting corners.
Other red flags to watch for:
No questions about leak history, flooding, condensation, or ventilation
No documentation (few photos, vague locations, no notes you can follow)
No discussion of moisture correction (only “treatment” or “spraying”)
“Toxic black mould” certainty without investigation, context, or limits
Refusal to define what you’ll receive in writing and when
Warning
If the inspector uses fear to sell certainty (“your family is in danger” + “only our tests can prove it”), treat that as a business tactic, not a diagnostic conclusion.
Advertisement — Article Continues Below
After The Inspection: Remediation, Moisture Control, And Verification
Fix The Water Or The Mould Comes Back
A mould inspection that ends with “clean this patch” is not finishing the job. The core objective is moisture control, because damp materials are where mould starts and returns.
Public guidance is consistent on timing: wet materials should be dried quickly and humidity controlled, and HealthLinkBC’s guidance on mould and biological contaminants highlights the practical emphasis on addressing moisture sources and drying wet materials within a tight window to prevent growth. Translating that into homeowner action means prioritizing leak repairs, improving ventilation, using dehumidification where appropriate, and avoiding “cosmetic fixes” (like painting over staining) that don’t change the moisture conditions.
Severity also affects who should do the work. For visible contamination, Health Canada’s moisture and mould reduction guidance provides clear size-based categories (small, medium, extensive) and recommends considering professional help for extensive contamination, which helps homeowners move from vague worry to a more concrete decision. Municipal guidance reinforces similar thresholds, and Toronto Public Health’s mould guidance draws on Canada Mortgage and Housing Corporation material to outline when occupant clean-up is reasonable and when a trained professional is recommended.
When you do hire a remediation contractor, ask what standard they follow. The ANSI/IICRC S520 standard is a widely recognized benchmark and the ANSI webstore listing for ANSI/IICRC S520-2024 describes a comprehensive scope that includes procedures, precautions, documentation, and post-remediation verification concepts across residential and other building types. That matters because competent remediation is not just “spraying something” but a controlled process that prevents cross-contamination and addresses affected materials properly.
Be wary of remediation plans that focus mainly on fogging, biocides, or encapsulation as a substitute for removal. Standards-focused industry discussion emphasizes physical removal as the core approach and the Society of Cleaning and Restoration Technicians overview on standards reflects the principle that killing mould alone is generally not adequate without removal and cleaning of contamination.
Finally, consider verification. “Looks clean” is not the same as “was cleaned correctly.” A good remediation job includes a clear scope, containment where needed, documentation, and a plan to confirm conditions are back to normal—often through visual verification and moisture confirmation rather than chasing perfect lab numbers.
Important
Treat remediation as a two-part project: (1) remove contamination safely and thoroughly and (2) correct the moisture conditions that made it possible. If part (2) is missing, recurrence is a predictable outcome, not bad luck.
Advertisement — Article Continues Below
FAQ
Signs of moisture and mould are usually practical and visual, and Health Canada’s homeowner guide on addressing moisture and mould describes looking for visible mould, water staining or discolouration, peeling paint, warped materials, and musty odours across rooms plus areas like basements, crawl spaces, attics, and storage zones. A good inspector also documents findings with photos and ties them to likely moisture causes.
Not usually. If mould is visible or moisture damage is obvious, the building already provided evidence that action is needed. Air testing can be helpful in limited “hidden mould” scenarios, but it should follow a thorough inspection and a clear question about what the test will change.
That framing is misleading because Health Canada’s Residential Indoor Air Quality Guideline: Moulds states there are no numerical exposure limits for indoor mould and that air test results cannot be used to assess health risks to occupants. Air sampling can provide context about building conditions, but it cannot deliver a simple pass/fail health verdict.
When concerns remain after inspection and there’s a strong reason to suspect concealed growth (for example, a leak history affecting wall cavities), a qualified professional may use targeted sampling to look for indicator patterns. The key is that sampling should support investigation rather than replace it.
Sampling methods serve different purposes and the Canadian Conservation Institute technical bulletin on mould prevention and recovery outlines common approaches including surface sampling (tape lifts/swabs) and bulk sampling (pieces of contaminated material). Surface samples can help confirm growth on a specific spot, while bulk samples help evaluate contamination of materials that may need removal.
Often yes, because outdoor air provides a rough baseline for what spores are naturally present in the environment. Without context, indoor numbers can be easy to misinterpret—especially during seasons with high outdoor spore loads.
Start by asking about recognized home inspection competency and accountability, and the Canadian Association of Home & Property Inspectors membership expectations describe structured requirements like exams, mentoring, continuing education, and standards plus ethics expectations. Then ask what mould- or moisture-investigation training they have on top of that baseline.
It can be, because it increases the risk of conflicted recommendations. If you proceed that way, insist on a written scope, transparent pricing, documentation, and ideally independent oversight or verification so the remediation scope isn’t driven by sales pressure.
Size and situation matter. As a general Canadian reference point, Toronto Public Health’s guidance on mould discusses thresholds (drawing on national housing guidance) that support DIY for small areas while recommending trained professionals for larger contamination. If contamination is extensive, hidden, or tied to ongoing moisture problems, professional help becomes the safer default.
Ask what standard they follow, how they will prevent spreading spores through the home, how they will handle contaminated materials, and how they will verify completion. If the contractor references an established standard, the ANSI/IICRC S520-2024 listing is a useful benchmark to understand the kinds of procedures and documentation a “standard of care” approach typically covers.
After you read the report, you should be able to answer three questions without guessing: (1) Where is the moisture coming from? (2) What materials and areas are affected and how extensive is it? (3) What are the prioritized next steps (moisture correction first, remediation second, verification third)?