For a typical 9 to 14 square metre bedroom, two litres of interior latex is usually enough for two coats. Divide your total wall area by the can's listed coverage rate (often 35 to 40 square metres per four-litre can) and multiply by two.
A Beginner's Guide to a Finish You'll Be Proud Of

Credit: Shutterstock
There's a particular Friday-night feeling that comes with a paint chip taped to the wall and a free Saturday ahead. You've picked the colour, watched a few videos, and you're almost ready — except for the quiet worry that by Sunday afternoon your walls will look streaky and you'll wish you'd just paid someone.
Here's the encouraging news: a good weekend paint job is mostly decided before the roller ever touches the wall. The streaks, the visible roller texture, the wobbly line where wall meets ceiling — these aren't bad luck. They're predictable outcomes of a few decisions made in the first hour, and once you know what they are, painting a room stops feeling like a gamble.
This guide walks you through those decisions and why each one matters, so on Sunday afternoon you peel the tape and step back to walls that look like a contractor did them. The technique is learnable in an afternoon.
Before you crack the lid, give yourself one quiet hour. This is where most amateur paint jobs are lost — not in the rolling, but in everything that happens before the brush goes near the can.
Clear the room and pull whatever's left to the centre. Cover the floor with canvas drop cloths rather than plastic; plastic is slippery, tears, and slides around just enough to find paint. Canvas stays where you put it.
Wash the walls next. Warm water with a splash of dish soap is plenty for most rooms; kitchens and anywhere greasy earn a TSP-substitute solution instead. Wipe down with a clean damp cloth and let the walls dry — paint won't bond to dust, and that's what's been settling there since the last time anyone touched these walls.
While they dry, patch. Lightweight spackle and a small putty knife handle every nail hole and most small dings; press a thin layer in, let it dry, and feather it smooth with a 220-grit sanding sponge. The same sponge, run lightly over any glossy trim, gives the new paint something to grip. For larger holes or doorknob dents, our drywall patching guide covers the technique.
Then make the priming decision, which is simpler than the internet makes it sound. New drywall, drastic colour changes, glossy trim, and any patch with a stain coming through — those want primer. A repaint in a similar colour over previously painted walls usually doesn't. The Canadian guidance from Benjamin Moore's product FAQ is direct: primer matters most on porous surfaces and where you're fighting porosity or sheen variation, not as a default extra step.
The frame for all of it: prep doesn't make paint stick better. It makes the finish look better, because the wall starts smoother.
Open a window and let the room breathe before, during, and after you paint. According to Health Canada's volatile organic compounds guidance, paints are common indoor sources of VOCs, and ventilation paired with low-emission products is the most effective way to keep indoor air healthier during renovation work.
If there's one skill that separates a tidy paint job from one that screams "I did it myself," it's cutting in.
"Cutting in" just means painting the edges by brush — the band where the wall meets the ceiling, the trim, the corners — before you go near a roller. The roller can't reach those last few centimetres without smearing onto the trim, so you paint that border first and the roller fills in the rest.
The right brush makes the biggest single difference. Reach for a 2.5-inch angled sash brush; the angled bristle edge is what lets you ride a clean line. The Purdy XL Glide and the Wooster Shortcut are two models that show up on almost every Canadian paint aisle, and either is a tool you'll keep for years.
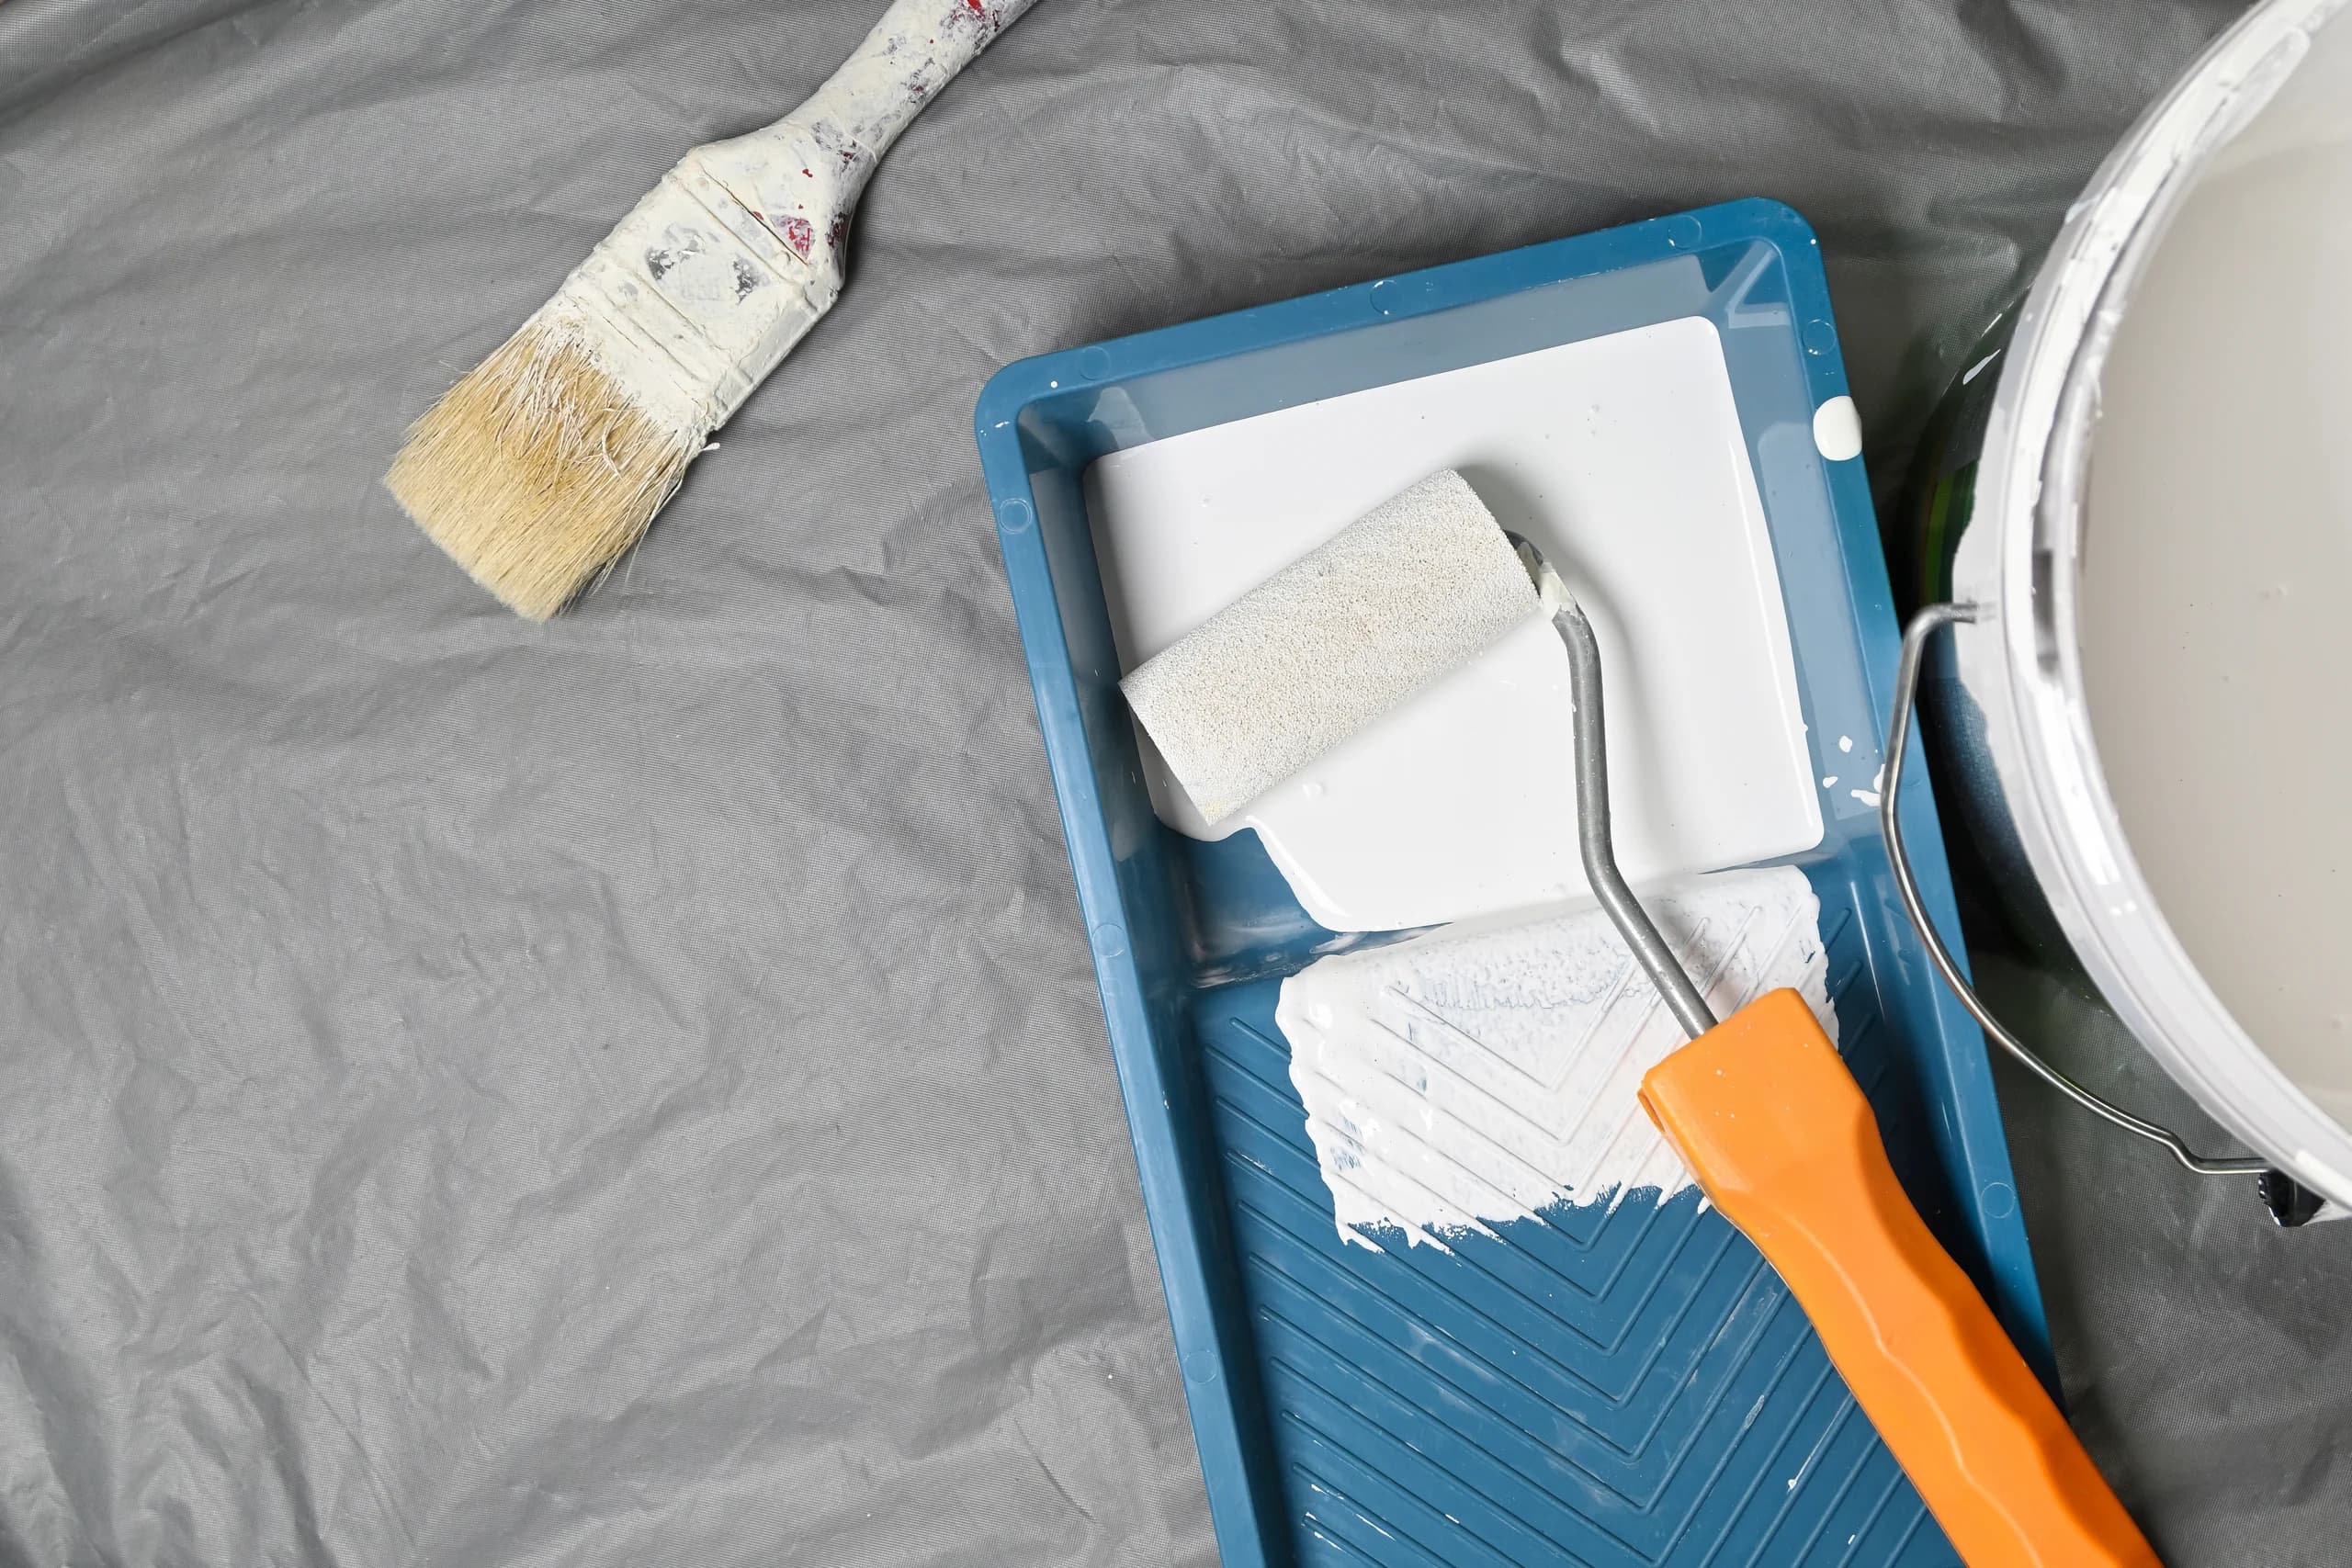
Loading the brush is where most beginners go wrong. Don't dunk past the bristle midpoint or drag the brush up the side of the can. Instead, dip only the bottom third of the bristles, then tap each side of the brush against the inside of the can to knock drips back in. DAP Canada's interior painting guide calls this out specifically — overloading causes runs and starves the tip, while a well-tapped brush gives you twenty minutes of clean lines instead of two.
Now the move. Hold the brush like a pencil. Paint toward the line you're cutting, not away from it — the bristles lay paint down ahead of the cleaner edge instead of dragging it across. Use the angled tip to ride the seam, and cut a band roughly five to seven centimetres wide so the roller has room to overlap.
Here's the single most important thing in this guide. Cut in one wall at a time, then roll that wall before the cut-in dries. Where wet paint meets dry paint you can see the seam, and that seam is the source of most of the streaks people complain about. The brush and the roller blend invisibly when both are wet.
A small note: many guides tell you to tape your trim. Plenty of pros don't — tape can bleed underneath and sometimes pulls a thin film off when removed. Tape the ceiling line and the floor; freehand the trim once you've got a steady hand.
This is the part everyone thinks they know, and it's also where streaks come from. The fix isn't to roll harder — it's to roll less.
Start with the right roller cover for your wall texture. Most Canadian drywall takes a 10 mm (3/8") nap — the default if you're not sure. A 12 mm (1/2") nap is right for orange-peel or stippled walls, common in basements and homes built in the 80s and 90s. A 6 mm (1/4") nap is reserved for very smooth plaster. The map in the DAP Canada interior painting guide aligns with this: thicker for textured, shorter for smooth.
Cover quality matters more than people expect. The mystery hairs you sometimes find sealed under dried paint come from cheap covers that shed. A Purdy White Dove or Wooster Pro Doo-Z costs a few dollars more and won't.
Loading the roller is its own small art. Pour paint into a tray and roll the cover up and down the ramp until it's evenly saturated and stops drinking. If it's dripping, you've gone too far — a roller that's too dry leaves streaks, one that's too loaded leaves runs.
The technique is straightforward. Roll a "W" or "M" pattern across a section about as wide as two arm-lengths, working from your cut-in band downward. Then immediately come back over the same section with long, light, top-to-bottom strokes — back-rolling, which lays the paint flat. Once you've laid it off, leave it alone. Don't go back to fix a thin spot you see ten seconds later; you'll create exactly the streak you were trying to avoid.
Two coats almost always look better than one, even if the can claims one-coat coverage. Wait for the first coat to reach the manufacturer's recoat time — usually one to two hours for modern Canadian latex paints.
If something doesn't look right, the cause is almost always one of four things. Modern Canadian interior paints are formulated with what manufacturers call extended open time — a longer window where paint stays workable so you can keep a wet edge across a wall, as described in Benjamin Moore's professional product guide. When the finish goes wrong, the wet edge was usually lost or the room conditions worked against the paint.
Screenshot this diagnostic before you start.
The good news about all four: a second coat with the right technique will fix most of them. Streaks aren't permanent.
Here's how the two days fit together when you don't rush them.
Friday evening, you shop the list and move furniture toward the centre. Take off outlet covers and switch plates; tuck the screws into a labelled sandwich bag. Saturday morning: drop cloths down, walls washed, patches drying. Saturday afternoon is for priming spots that need it, then your first coat — cut in one wall, roll it, move on.
By Saturday evening you'll have one coat on. Wrap your brush and roller cover tightly in plastic and put them in the fridge overnight. Sunday morning is the second coat in the same rhythm; you'll be done by lunch.
Sunday afternoon, pull the painter's tape while the paint is just barely tacky — too dry and the tape lifts a thin film; too wet and the line bleeds. If the paint has fully cured, score along the tape edge with a utility blade before pulling. By Sunday evening the outlet covers are back on and the room is yours again.
For an average bedroom or office (9 to 14 square metres of wall), here's what you need: canvas drop cloths, painter's tape, lightweight spackle and a small putty knife, a 220-grit sanding sponge, a 2.5-inch angled sash brush, a 9-inch roller frame, a 10 mm nap roller cover (extra if textured), and a roller tray with a disposable liner. Two litres of quality interior latex is usually enough for two coats; check the can's coverage rate against your wall area before checkout.
When you're done, don't pour leftover paint down the drain or toss it in the trash. The Product Care Recycling paint program runs free drop-off depots across British Columbia, Saskatchewan, Manitoba, Ontario, New Brunswick, Prince Edward Island, Nova Scotia, and Newfoundland and Labrador. Quebec readers have Éco-Peinture, with depots in more than seven hundred municipalities. Save a small labelled jar of your wall paint for inevitable touch-ups.
If this weekend went well, replacing a kitchen faucet is a natural next project.
About the Author
Angela Nightingale is the Senior Editor at Homeowner.ca with two decades of experience in digital publishing and content strategy. She has owned two homes, taken on her share of DIY projects, and learned what most guides fail to mention. She writes from the belief that the best home guidance comes from people who have lived through the decisions — and her goal is always to leave readers feeling confident, not overwhelmed.
For a typical 9 to 14 square metre bedroom, two litres of interior latex is usually enough for two coats. Divide your total wall area by the can's listed coverage rate (often 35 to 40 square metres per four-litre can) and multiply by two.
Matte hides wall imperfections but is harder to wipe clean. Eggshell has a soft, low-lustre glow and wipes down well — the default for bedrooms, living rooms, and offices. Satin is shinier and more washable, often chosen for hallways and bathrooms.
Usually no, if you're going over previously painted walls in a similar colour. You do want primer for new drywall, drastic colour changes, glossy trim, and any patch where a stain might bleed through.
Most modern Canadian latex paints are dry to the touch within an hour and ready for a second coat within one to two hours. The exact recoat window is on the can; a cold or humid room will lengthen it. If the first coat still feels tacky, wait.
Almost always one of three causes: the room was too hot or dry, you went back over paint that had started to set, or your roller cover was cheap and didn't release evenly. Roll one wall at a time after cutting in, keep the room around 18 to 22 °C, and use a quality cover.
Safer with them at least cracked. Paints emit volatile organic compounds as they dry, and federal guidance is that ventilation paired with source control is the main strategy for managing indoor air during renovation work. Crack a window, run an exhaust fan that vents outdoors, and keep children and anyone with asthma out of the room until the smell fades.
Wipe the rim clean, tap the lid back on with a rubber mallet (a hammer dents the rim and ruins the seal), and store the can upside down somewhere cool, dry, and frost-free. The upside-down trick lets the paint seal itself at the lid. Latex stored this way stays usable for two to three years.
Wrap and skip the wash, as long as you're using it the next day. Wrap the bristles tightly in plastic, press the air out, and put it in the fridge — the cool slows drying further. Let it warm up for ten minutes in the morning. For longer breaks, wash with warm water for latex or mineral spirits for oil-based.


